
AX9000 Hard Drive Configuration Manual
![]()

AX9000 Hard Drive Configuration
(Last update on 12/06/2023)
Tutorial created by @Elchotovolador and edited by @JuanMa_89:
![]()
Let's Start
-
Once the hard drive or USB is inserted, you should check if it is recognized. For this, access the Luci web interface at http://192.168.31.1/.
NOTE: YOU WILL NOT HAVE ACCESS TO THE CONTENT VIA THE WEB
- PC COMPUTER PREPARATION FOR RECOGNITION OF THE HARD DRIVE INSERTED IN THE XIAOMI AX9000 AS NETWORK STORAGE.
-
Sharing a hard drive in Windows
- First, we will prepare our PC to share a folder with our receiver. If not already done, you need to activate Samba in the PC. To do this:
- Access Windows system settings and select applications.
- Then go to programs and features.
- Next, activate or deactivate Windows features.
- Check all the options for compatibility with the SMB file-sharing protocol if not already enabled.
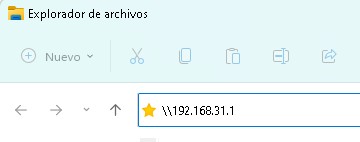
- Now go to the file explorer, copy and paste the router address with backslashes, and you will have access to the AX9000's hard drive.
\\192.168.31.1
-
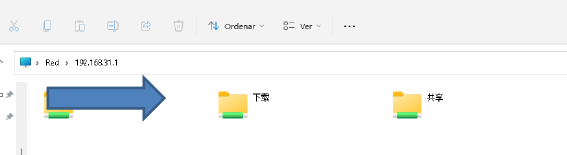
Access from PC will show all network hard drives available in your network.

- Hard drive
![]()
THE MOST IMPORTANT PART STARTS NOW
Note: Follow these steps, it took me a lot to understand the functioning after 4 hard drive formats doing tests on the Xiaomi AX9000.-
- From the Mi Home Application.
- Enter the Mi Home app, access the AX9000 router, and look for the Mi Storage option.
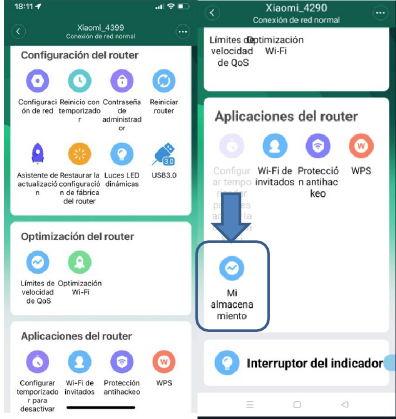
- You will see the inserted USB device in the AX9000, in my case, an external 3TB hard drive.
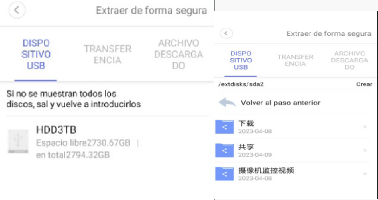
- Once your device appears, click on it and you will see the folders created by default in Chinese. You can change the name but only from the MIHome app.

- For this example, I created the following folders for this manual. -
(no PC, no mobile app, no web) I reiterate the same thing, folders can only be created from the MIHOME app
- Cameras - For the NAS of Xiaomi cameras.
- 3TB Hard Drive - For private content.
- Private Unshared - A folder not shared on the network, that is (private).
![]()
ACCESS FROM THE SMARTPHONE
Note: It does not allow creating folders in the root of the hard drive but inside the previously created ones.-
- Access to the hard drive must be done from the mobile phone with the MIHOME app, as access to the hard drive is not available from the PC using the web 192.168.31.1 (see to believe).
-
Xiaomi File Manager - The worst of all I've tried for this manual.
Download here - Access the app, tap on the top left corner.

- Press remote and create your access to the hard drive via the web.
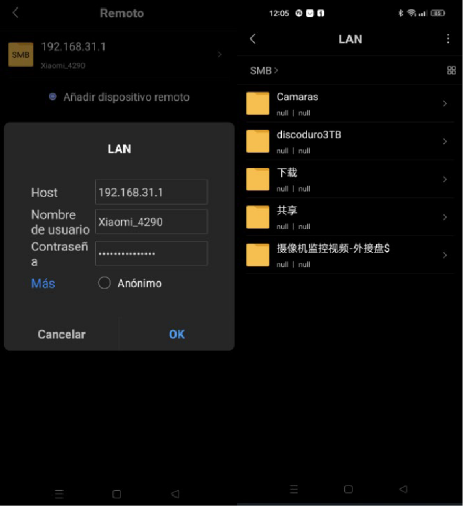
- Now you will have access to the hard drive from your network to transfer files etc... in the shared folders within them. -
CX File Explorer Manager - Very intuitive use.

Download here - The configuration is similar to the previous one but the menu is much better in every way for its ease of use when transferring files within the same network.

![]()
 Asistente XiaoHack
Xiaohack V 3.3 | © Copyright 2024 | Users Online: 0 | Estado: Offline