
![]()
WIREGUARD UI INSTALLATION MANUAL / docker
(Last edition on 06/11/2024)
Tutorial created by @elchotovolador and edited by @JuanMa_89:
![]()
*** Creator and developers download page ****
https://github.com/ngoduykhanh/wireguard-ui
***** Versions *****
https://github.com/ngoduykhanh/wireguard-ui/releases
**** SSH / putty Commands ****
Manual created with the version as of its date.-
cd /tmp
wget https://github.com/ngoduykhanh/wireguard-ui/releases/download/v0.5.2/wireguard-ui-v0.5.2-linux-arm64.tar.gz
tar zxf wireguard-ui-v0.5.2-linux-arm64.tar.gz -C /usr/bin
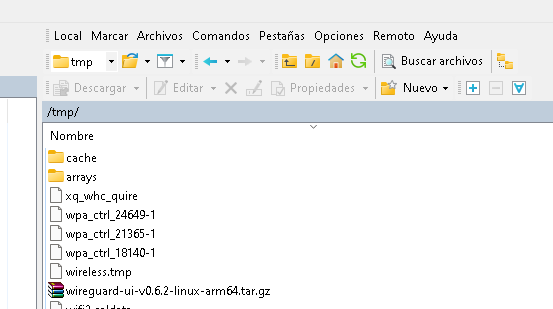
1.- Open putty and go to the tmp folder
cd /tmp
2.- Download the docker version of Wireguard UI
wget https://github.com/ngoduykhanh/wireguard-ui/releases/download/v0.5.2/wireguard-ui-v0.5.2-linux-arm64.tar.gz
3.- Once the docker version is downloaded, it must be installed.
tar zxf wireguard-ui-v0.5.2-linux-arm64.tar.gz -C /usr/bin
VERY IMPORTANT
Wireguard must be installed to use the docker-ui client
*** MANUAL INSTALLATION ***
* If automatic installation and/or version update doesn't work, it should be done manually.
1.- Transfer the downloaded file to the tmp directory using WinSCP.
2.- Open putty and run the following command:
tar zxf wireguard-ui-v0.6.2-linux-arm64.tar.gz -C /usr/bin
We start with docker and/or Wireguard UI
Activate Wireguard UI, open PuTTy
1.- Run the following SSH command:
wireguard-ui
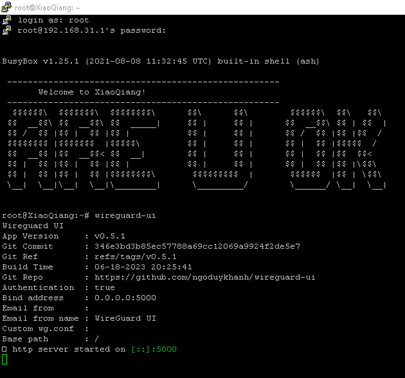
The Wireguard UI docker will be active.
Access it at 192.168.31.1:5000
The default login is:
user: admin
password: admin
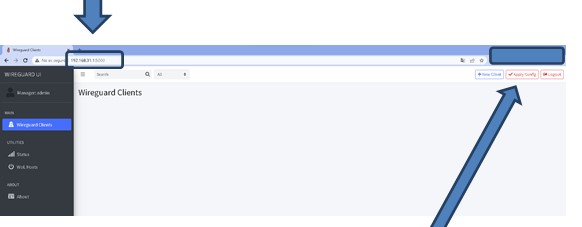
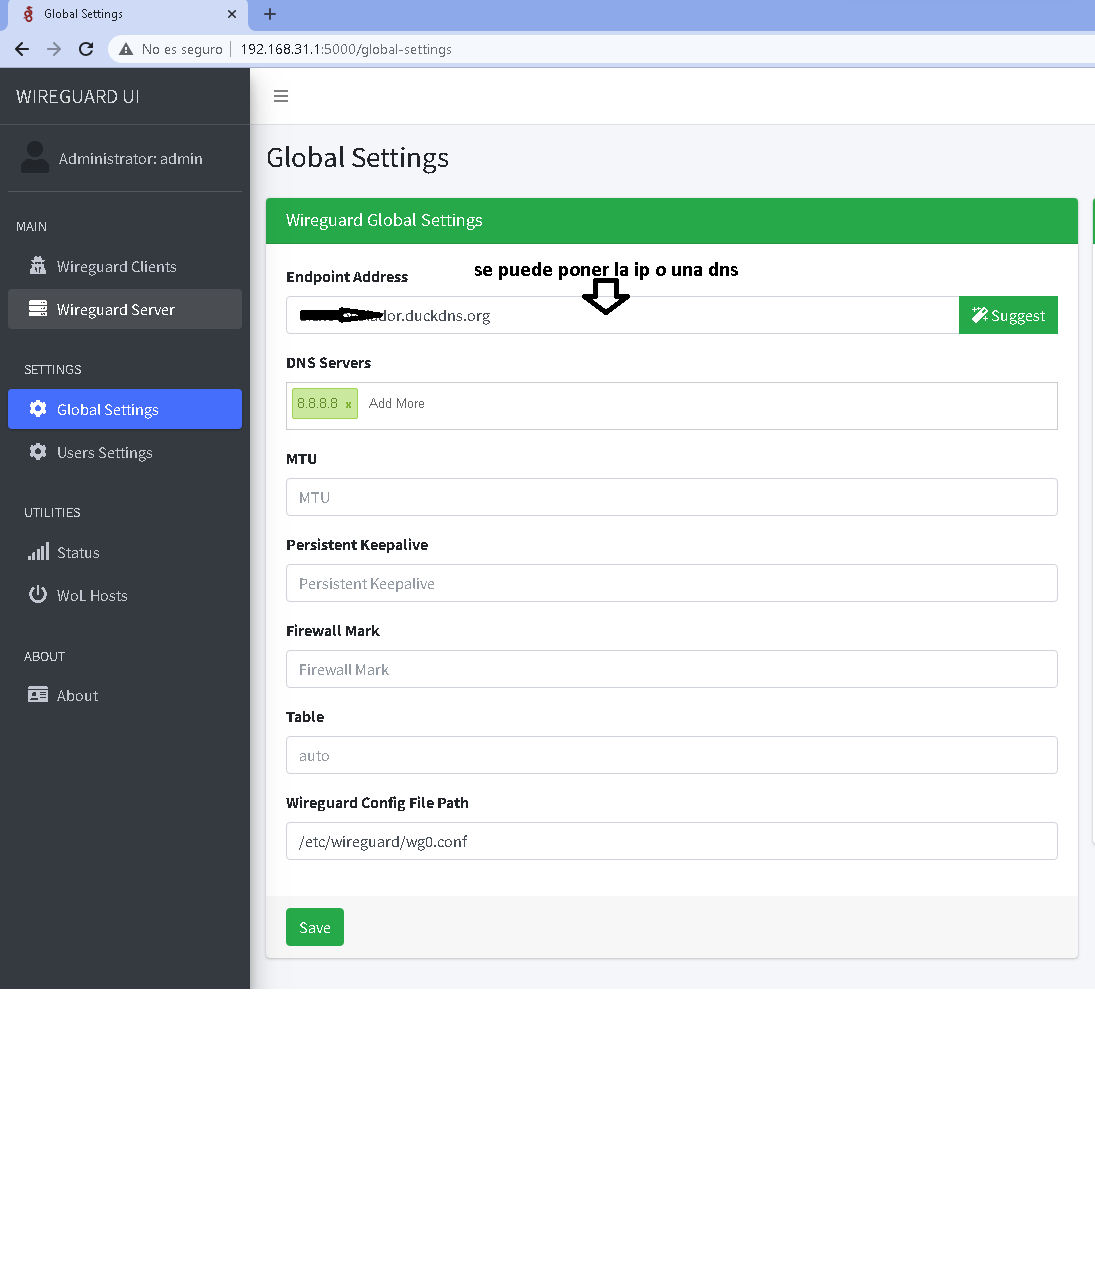
Create clients and once finished, save the configuration.


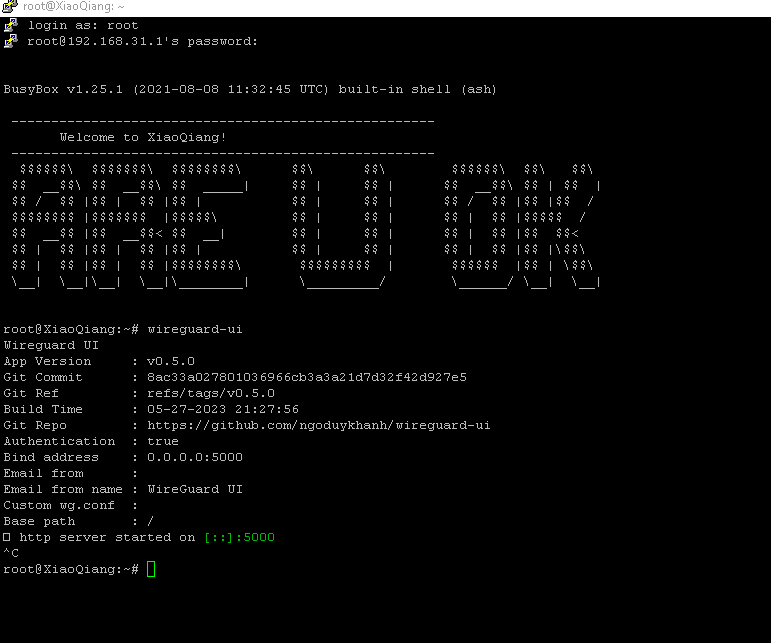
Close the SSH session by pressing ctrl+c to deactivate Wireguard UI.
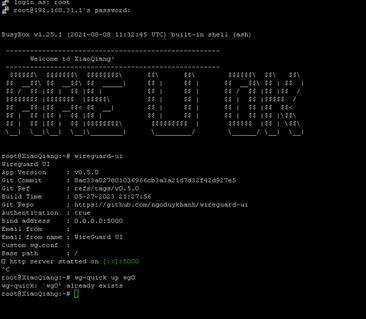
The Wireguard configuration will be created with the modified wg0 file. Start Wireguard with the following command to verify its creation and modification via SSH:
wg-quick up wg0
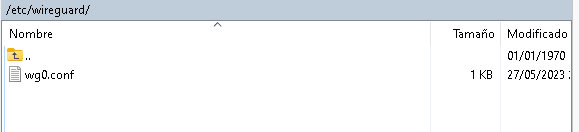
In WinSCP the file created and modified by Wireguard UI will appear.
Run the command ifconfig to see that the Wireguard web interface has been created.
VERY IMPORTANT STEP
Restart Wireguard to save changes and keep the service active from SSH:
service wireguard restart
To run docker, use the following SSH command:
wireguard-ui
Create clients, modify configurations, etc. Once finished, save the configuration.
Restart Wireguard to save changes and keep the service active from SSH:
service wireguard restart
![]()
![]()
 Asistente XiaoHack
Xiaohack V 3.3 | © Copyright 2024 | Users Online: 0 | Estado: Offline