
OpenWRT Tutorial for Xiaomi AX9000 (UART + TFTP)
![]()

Welcome to the OpenWRT Tutorial for Xiaomi AX9000
(Last updated on 08/03/2025)
Tutorial created by @XiaoHack_web.
![]()
Prerequisites
- Xiaomi AX9000 router with UART access.
- USB-TTL adapter (CP2102, CH340, FTDI...).
- TFTP server on the PC (e.g., TFTPD32 or SolarWinds).
- Required files:
xiaomi_ax9000-initramfs-uImage.itbfactory.ubi
- PC with static IP: 192.168.31.100.
- SSH and SCP client: PuTTY and WinSCP.
You can download all necessary tools from here: https://xiaohack.es
![]()
Step 0: Install SSH and unlock U-Boot
1. Install SSH with Xmir-patcher XiaoHack.
2. Connect to the router via SSH using PuTTY.
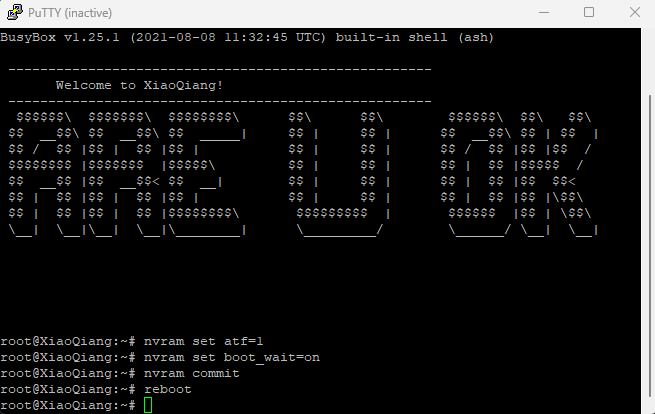
3. Enter the following commands:
nvram set uart_en=1
nvram set atf=1
nvram set boot_wait=on
nvram commit
Now U-Boot will be unlocked.
![]()
Step 1: Connect the TTL adapter to the PC
1. Connect the USB-TTL adapter (CP2102, CH340, FTDI...) to the PC.
2. Open Device Manager (Win + X → Device Manager).
3. Expand "Ports (COM and LPT)" and note the COM port number (e.g., COM3 or COM5).
![]()
Step 2: Configure PuTTY for the serial session
1. Open PuTTY and select:
- Connection type: Serial
- Serial line: the COM number you noted earlier (e.g., COM3)
- Speed: 115200
2. In "Connection → Serial" configure:
- Speed: 115200
- Data bits: 8
- Stop bits: 1
- Parity: None
- Flow control: None
3. Save the session with a name (e.g., "AX9000 UART").
![]()
Step 3: Connect the adapter pins to the router
Connect the pins as shown in the table:
- GND → GND
- TXD → RX
- RXD → TX
- DO NOT connect VCC (3.3V)
![]()
Step 4: Access U-Boot
1. Open PuTTY.
2. Power on the router.
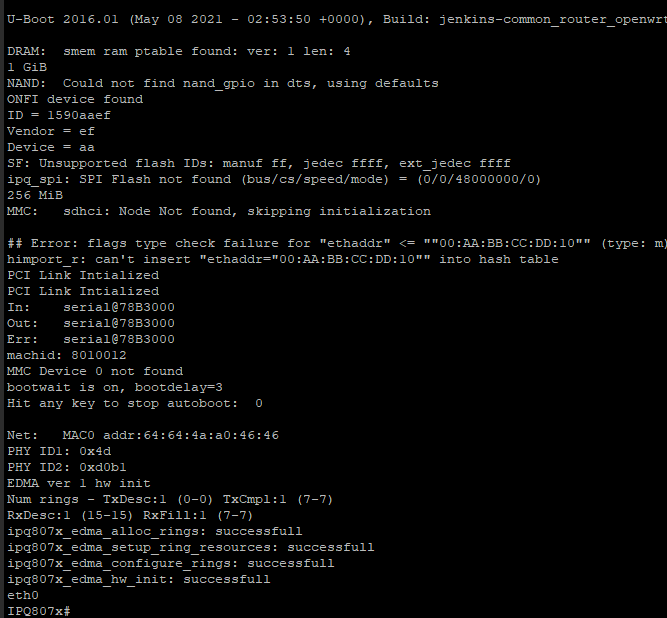
3. You should see text in the terminal, such as U-Boot boot logs.
4. When you see:
bootwait is on, bootdelay=3
Hit any key to stop autoboot:
Quickly press Enter.
![]()
Step 5: Set up the TFTP server
1. Download and install SolarWinds TFTP.
2. Copy xiaomi_ax9000-initramfs-uImage.itb into the root folder.
3. Configure your PC's IP:
IP: 192.168.31.100
![]()
NOW THE INSTALLATION
![]()
Step 1: Connect PC ↔ Router
Connect the Ethernet cable directly from the PC to a LAN port on the AX9000 (LAN1 or LAN2).
Step 2: Configure static IP on your PC
Set your PC’s network card to:
IP: 192.168.31.100
Mask: 255.255.255.0
Gateway: (blank or 192.168.31.1)
In Windows: Control Panel → Network and Internet → Change adapter settings → Right-click → Properties → IPv4.
In Linux: Network settings → Edit connection → IPv4 → Manual.
In macOS: System Preferences → Network → Advanced → TCP/IP → Configure IPv4: Manually.
Step 3: Configure SolarWinds TFTP
- Open SolarWinds TFTP Server.
- In the "File" menu → "Configure".
- Verify:
- Root directory: where the
.itbfile is located. - Mode: "Receive/Send files".
- Root directory: where the
- Ensure the firewall allows UDP port 69.
Step 4: Load OpenWrt from U-Boot (UART)
In your PuTTY session, type the following commands one by one:
setenv ipaddr 192.168.31.1
setenv serverip 192.168.31.100
tftpboot 0x44000000 xiaomi_ax9000-initramfs-uImage.itb
If everything goes well, you will see something like:
TFTP from server 192.168.31.100; our IP address is 192.168.31.1
Filename 'xiaomi_ax9000-initramfs-uImage.itb'.
Load address: 0x44000000
Loading: ##########...
done
Bytes transferred = *******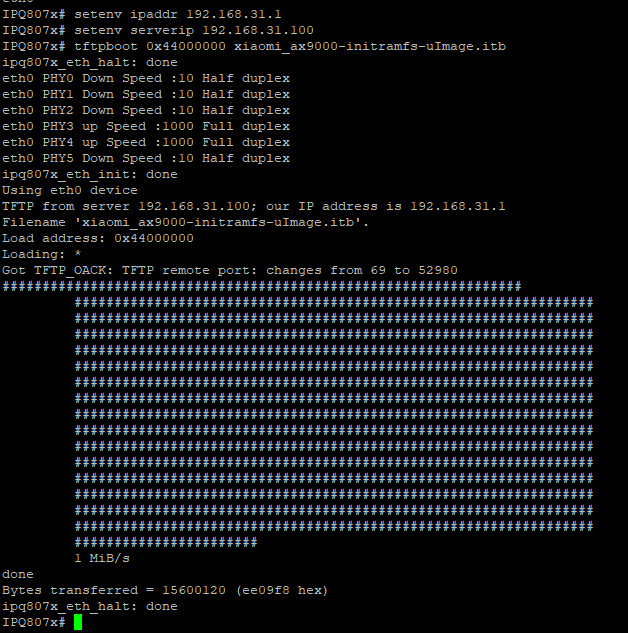
Then OpenWrt will boot from RAM.
Once inside OpenWrt (via network):
- The router IP will be: 192.168.1.1
- Connect via SSH or browser
Step 5: Access OpenWrt
Once loaded, the router will be on 192.168.1.1. Connect:
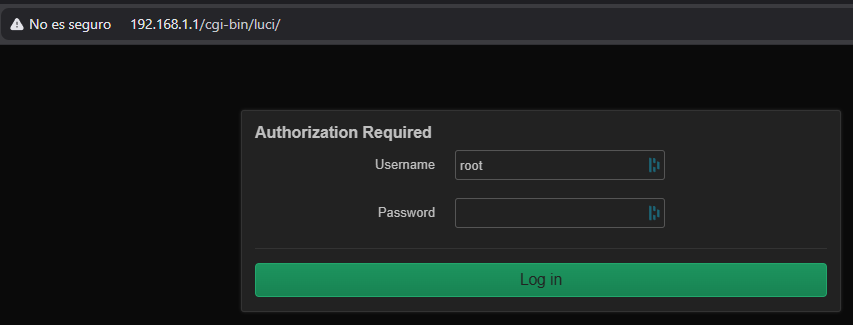
- Via SSH or web browser.
- User: root, no password.
You now have OpenWrt running from RAM.
Step 6: Flash the permanent firmware
1. Access the OpenWrt interface from the browser or via SCP and upload the final firmware:
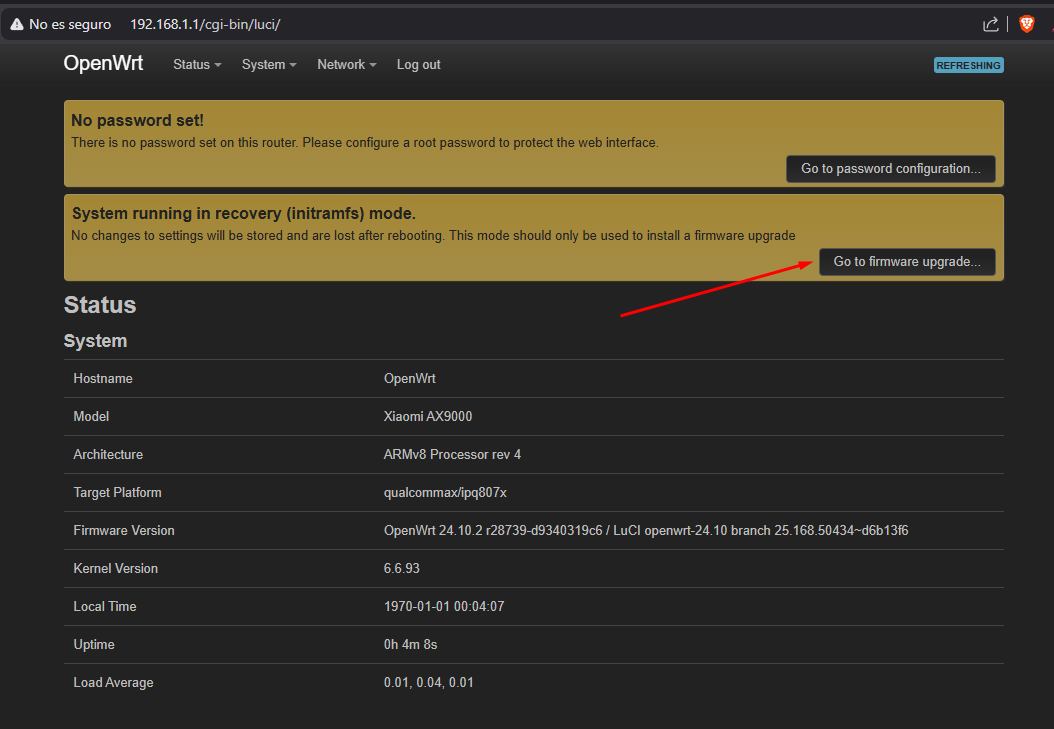

openwrt-24.10.2-qualcommax-ipq807x-xiaomi_ax9000-squashfs-sysupgrade.bin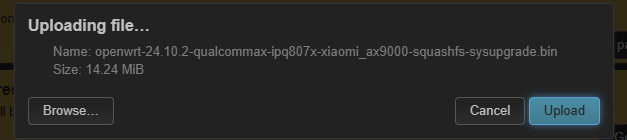
2. Click Upload.
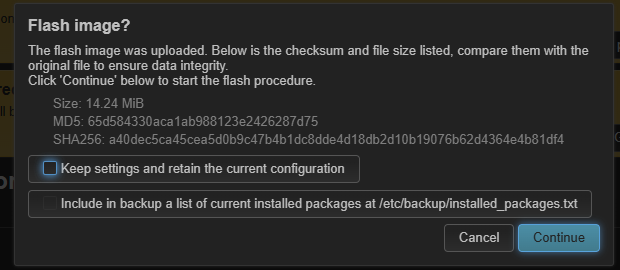
3. Disable the "Keep settings and retain configuration" option.
4. Click Continue to start flashing.

Once the process begins, the router will restart with official OpenWrt.
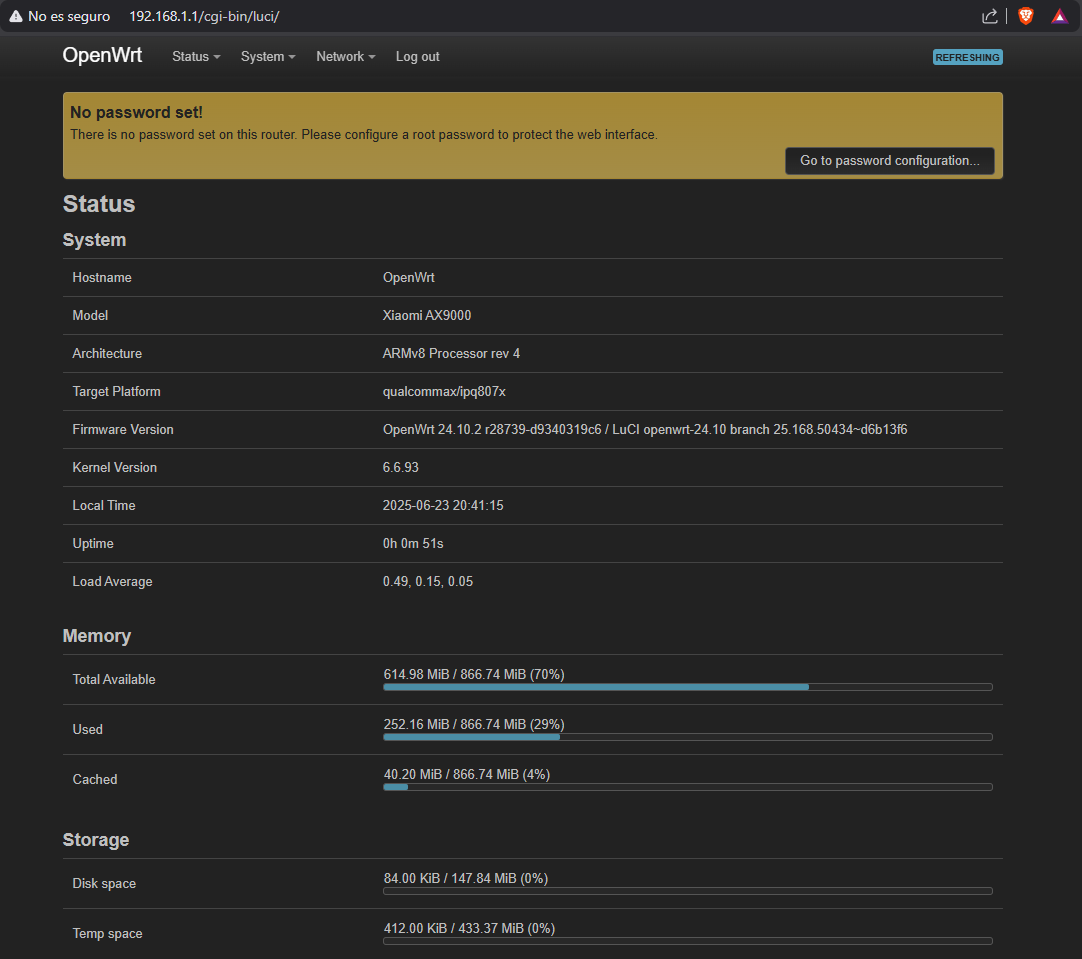
5. Wait a few minutes for the router to reboot.
6. Access OpenWrt at 192.168.1.1.
7. Configure the router according to your needs.
8. Done! You now have OpenWrt installed on your Xiaomi AX9000.
Final result
- The router will boot from NAND.
- OpenWrt will be permanently installed.
- Access http://192.168.1.1.
- SSH and LuCI (if installed) will be available.
- Change the root password and configure the system as you like.
![]()
Recommended files
xiaomi_ax9000-initramfs-uImage.itb→ Temporary boot via RAM/TFTP.openwrt-24.10.2-qualcommax-ipq807x-xiaomi_ax9000-squashfs-sysupgrade.bin→ Permanent firmware for flashing.
Final advice
initramfs first to ensure everything works before permanently flashing with .ubi.
![]()
Congratulations!
You have completed the installation of OpenWrt on your Xiaomi AX9000.
Remember you can customize and optimize your router with the packages and configurations you need.
If you have questions, check the official OpenWrt documentation or visit the XiaoHack forum.
Enjoy your new firmware!
![]()
Useful links
![]()
 Asistente XiaoHack
Xiaohack V 3.3 | © Copyright 2024 | Users Online: 0 | Estado: Offline