Xmir-Patcher-Xiaohack-ES Index

TUTORIAL HACK Xmir Patcher for AX 1800, AX 3600, AX3000, and AX9000.
Redmi AX 1800, Redmi AX 5400, Redmi AX 6000
BE3600, BE7000.
(Last updated on 03/10/2024)
STEP 1 (root password) STEP 2 (Unzip file and SSH) STEP 3 (Change language if needed) STEP 4 (Increase Power)
Advantages of using Xmir-Patcher-Xiaohack:
- Menu in Spanish.
- Translations to SPANISH.
- Backups by model.
- No need to download anything, just the .zip file.
- Saves you time.
- Permanent SSH.
NECESSARY TOOLS:
- Root Password: via the web https://xiaohack.es
- Putty
- WinSCP
- Xmir-patcher-xiaohack-main.zip file (Xiaohack repository version)
All necessary tools can be downloaded here: https://xiaohack.es
![]()
STEP 1. (Let's find out the root password of your router)
-
We need the root password of your router, which is unknown and unique to each device. To find out the one corresponding to your router, visit the web: https://xiaohack.es
-
Enter the SN (serial number) of your AX3600 to generate the root user password. Example: 266XX/E0P80XXXX
-
Open NotePad or Block de Notas and save the password generated on the web.
![]()
STEP 2. (Unzip the downloaded file)
-
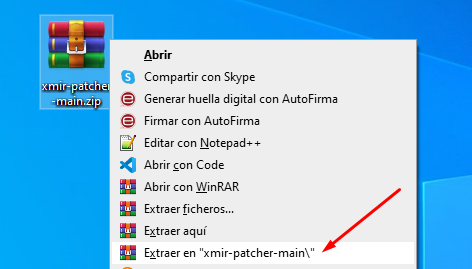
-
Once unzipped, a folder with the corresponding files will be created, and we will execute the following.
-
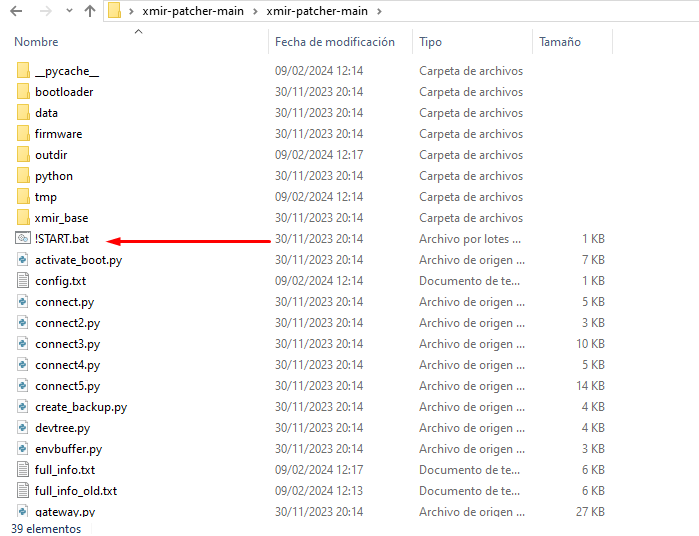
-
Now we would have the menu in a Windows cmd window.
-
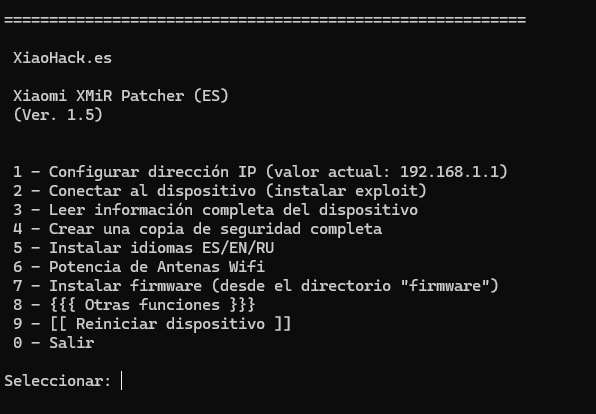
-
In the menu, we will select number 1 (default is 192.168.31.1, I changed the IP for the manual). After pressing 1, enter your router's IP, in this case, mine is 192.168.1.93.
-

-
Then in the menu, we will select number 2, which will connect to the router, identify it, and ask for the password (I've already activated it, so it doesn't do it again). It will then perform the exploit to activate SSH.
-

-
It will then do the magic and open SSH (by default, the saved root password is 'root', which we will change in the next steps).
-

-
To make it permanent, we will select number 8 { Other function }, and then number 7, Install permanent SSH.
-

-
Now we will change the root password, in option 2 of the same submenu.
-
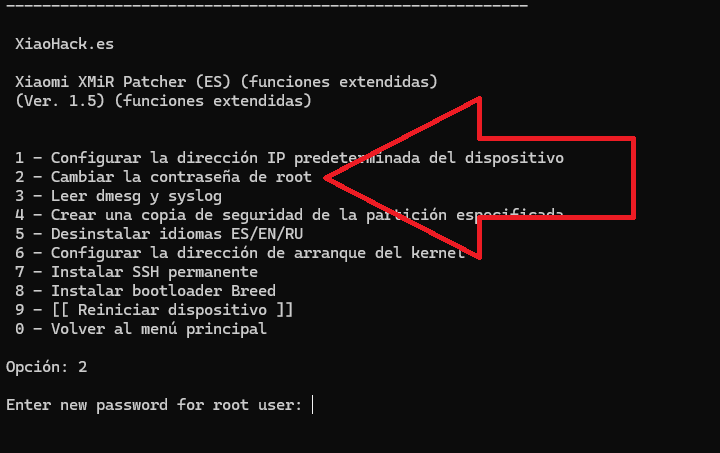
-
We will enter the password from XiaoHack.
-
Once all of this is done, we will have permanent SSH, and we can increase the power by editing the router's rc.local via WinSCP. Press 0 in the menu to return to the main menu.
STEP 3. (Change the language if needed)
-
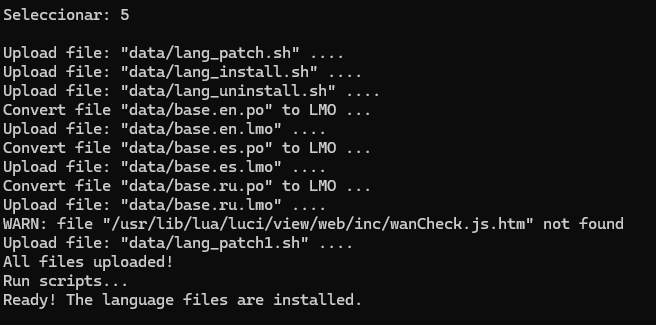
To change the language(IF NECESSARY) (Valid for some Chinese routers), tested on:
- Xiaomi redmi ax1800,
- Xiaomi redmi ax6000,
- Xiaomi BE3600,
- Xiaomi BE7000,
Press number 5.
-
-
Now the router will be in Spanish.
-
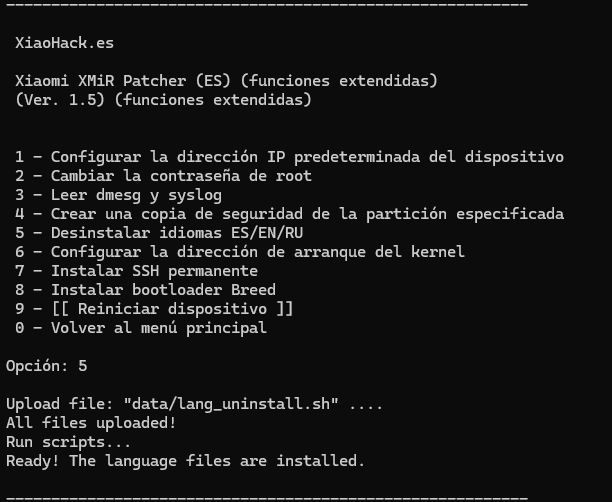
If you wish to revert the language installation, just follow these steps:
- Select number 8 in the main menu (to access the submenu).
- Select number 5.
-
-
This will uninstall the previously added languages (Spanish, English, and Russian).
![]()
STEP 4. (Increase WIFI Antenna Power)
-
Press number 6.
-

-
To increase the WIFI antenna power(option 9, --- Update rc.local --- is only valid for some routers), tested on:
- Xiaomi AX1800,
- Xiaomi AX3000,
- Xiaomi AX3600,
- Xiaomi AX9000,
-

-
In this menu, it's simple: if we want to individually change the power, we will select 1, 2, 3 for the different antennas (Not all routers have the GAMING antenna).
-
If you want to change all antennas to maximum, select number 7:
-

-
Write the desired power and press enter.
-
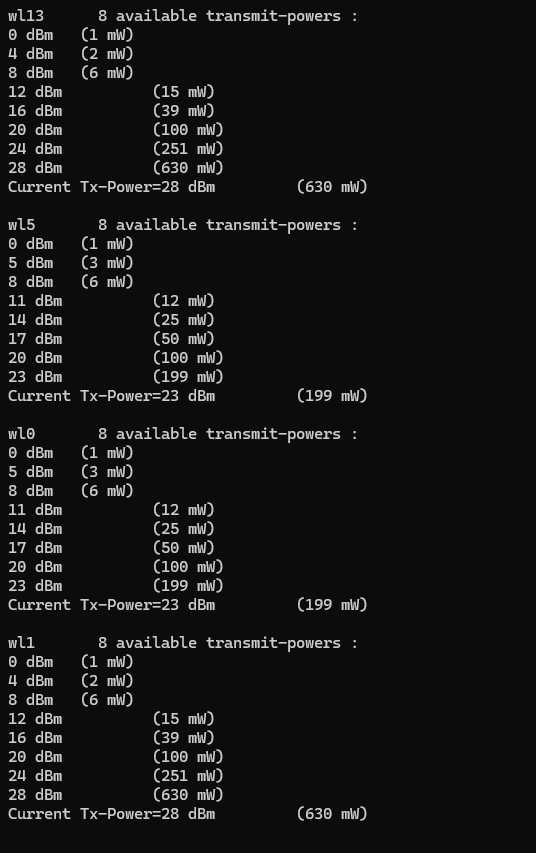
Finally, verify the antenna powers with number 8.
-
-
This way, the router will be transmitting at maximum power (Depending on the model, it will be 30db or 28db for 5g or 30 and 23 for 2.4g).
![]()
OTHER INTERESTING INFO:
-
- If you want to disable the router's power LED (and have chosen not to use the app):
- Enter via WinSCP to the file/etc/rc.localand add at the end:
(sleep 60;cd /sys/class/leds/led_blue/;echo 0 > brightness)&
- If you want it to reboot automatically: Enter via WinSCP into/etc/crontabs/root:
and add the following line (it will reboot at 4:30 AM):
30 4 * * * sleep 70 && touch /etc/banner && reboot
![]()

 Asistente XiaoHack
Xiaohack V 3.3 | © Copyright 2024 | Users Online: 0 | Estado: Offline
